
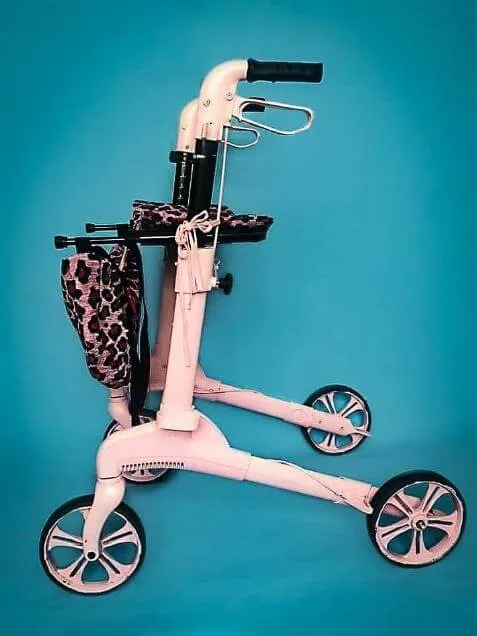
Before

After
Step 1:
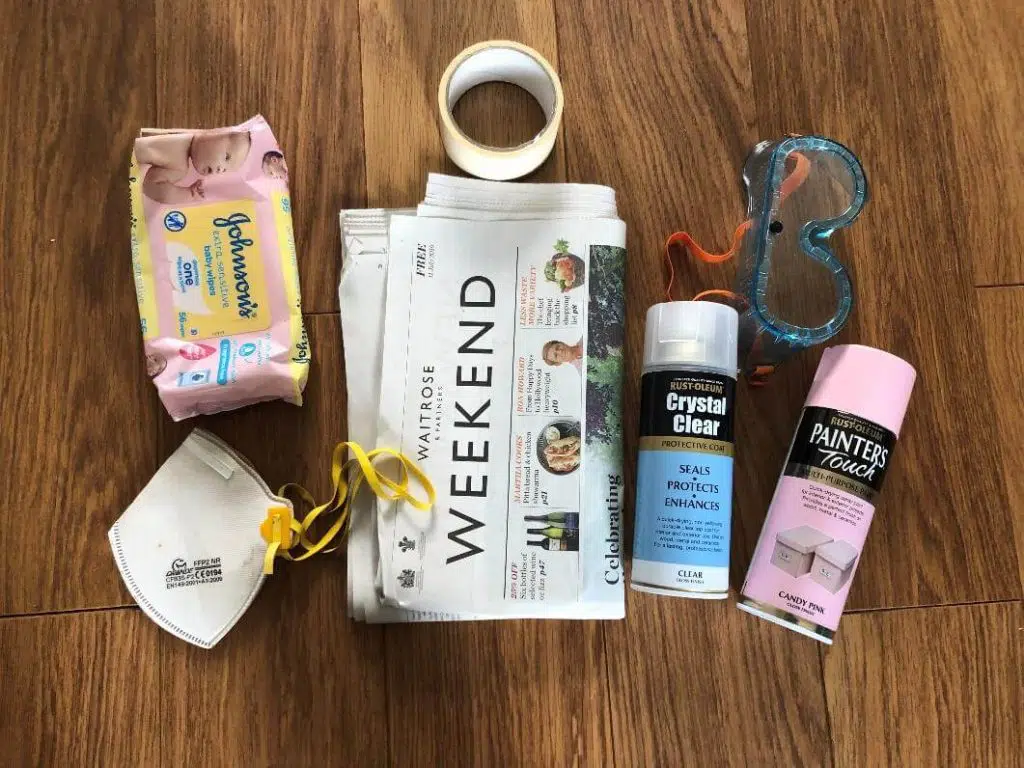
Clean your walker with your baby wipes and then dry off any residue left. You want the plastic as clean as possible so your paint sticks. If you like you can also lightly sand the surface to help the paint stick but I skipped this step and it hasn’t been an issue. You will also need to remove the wheels.
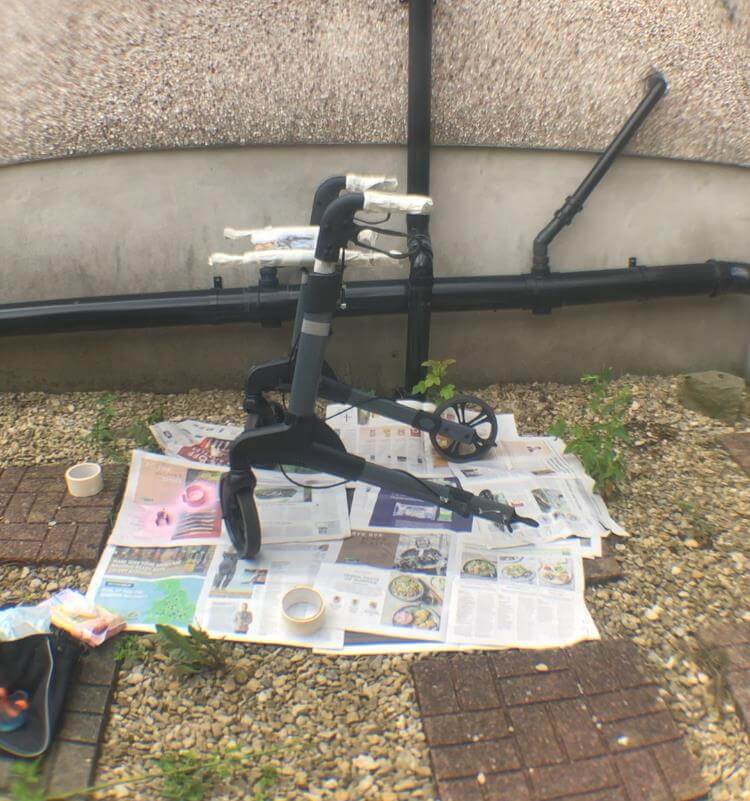
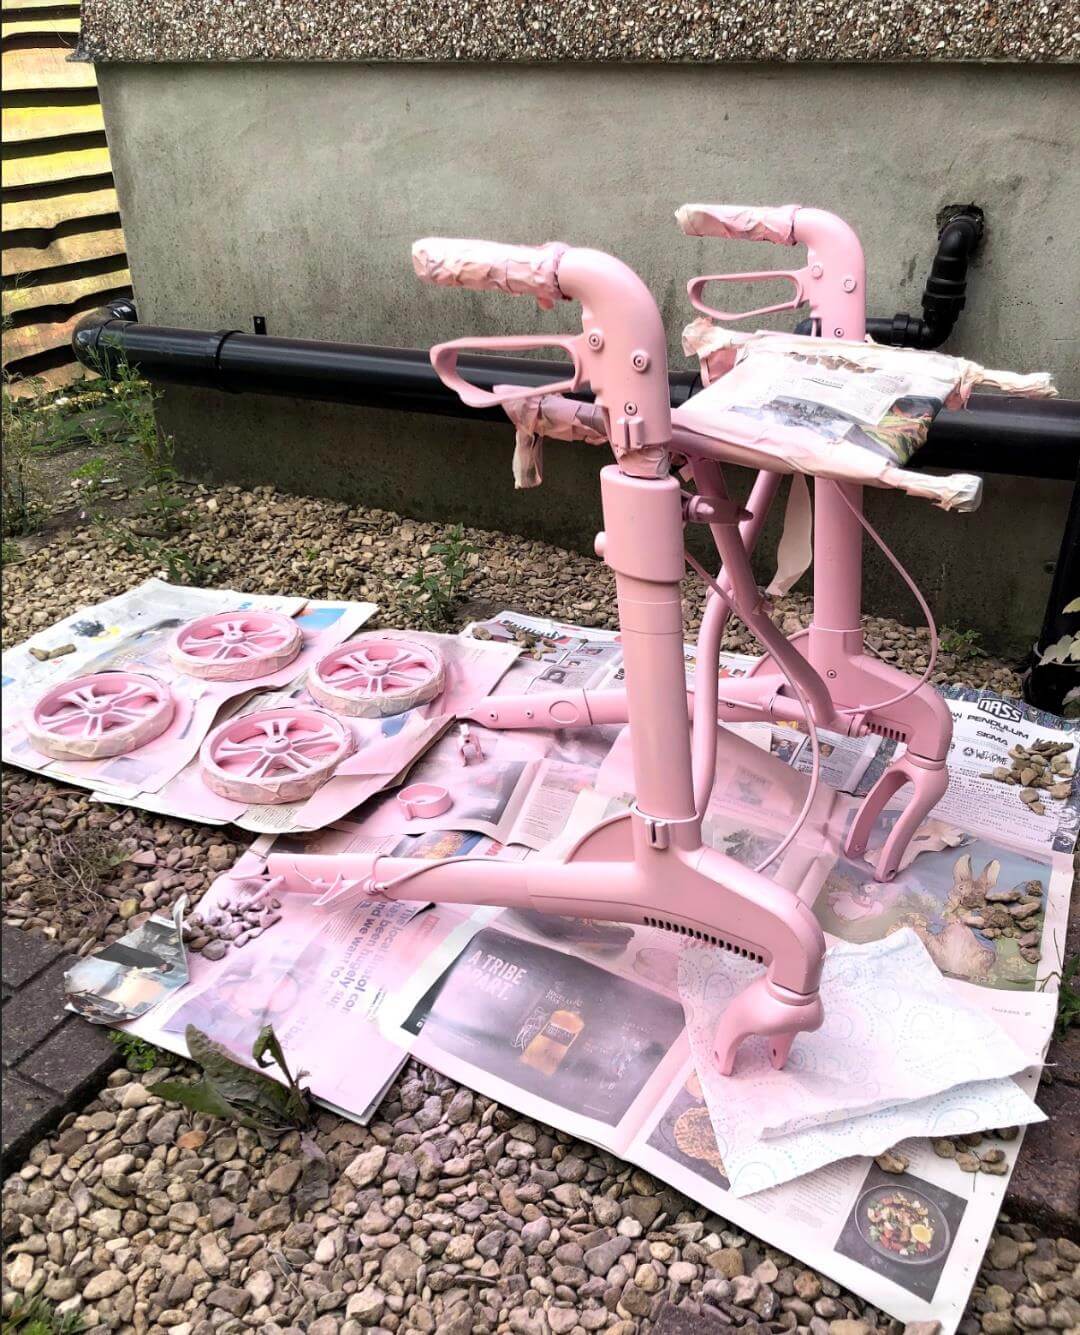
You will also want to use the newspaper to cover any areas that you do not want painted. In my case that meant covering the rubber handles, the seat and the wheel which I will show you in a later pic.
Step 2:
Once everything is covered, it’s time for the fun bit, spray on your base coat colour. The first coat is going to look patchy and terrible. Don’t worry, the second coat will resolve this. Wipe off any drips with the baby wipes before they dry. You want to also keep your spray can a good distance from the walker. Think of it as trying to cover it in a fine mist. You want to hold the can about a foot away. If you hold it too close you get too concentrated spray and it will be more obviously uneven when finished.
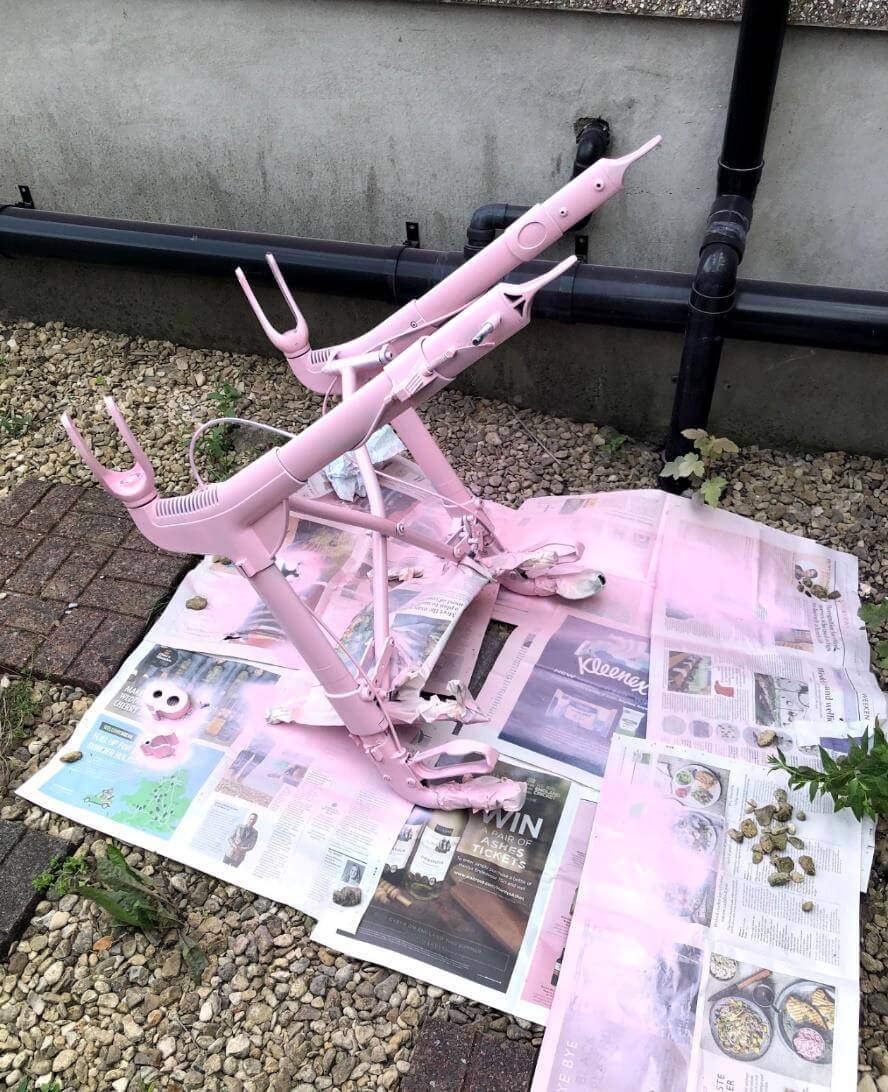
Once you have done your first coat you are going to want to flip the walker and spray it while it is upside down. This insures more even coverage all over. Before you do this you will need to leave it for the required touch dry length of time or you will smudge some of your paint.
Step 3:
While waiting for the body to dry you can move onto the wheels. These are probably the trickiest part. The spray paint won’t work on anything that is rubber (it slowly rubs off) so if you want to spray the wheels like I did you will need to cover all the rubber in masking tape. It just takes a little patience and time. Once you have covered spray them as normal.
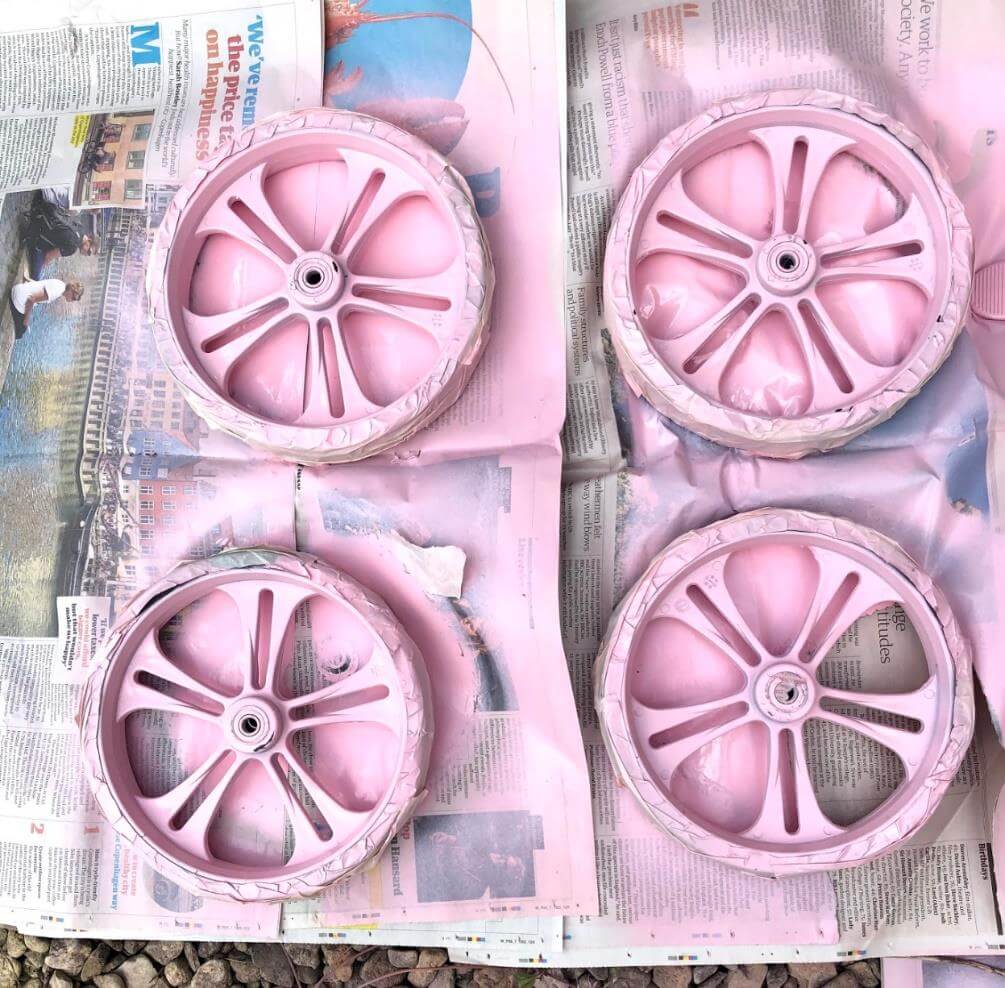
I then flipped mine straight over to do the other side but this did mean one bit sticking to the
newspaper. This didn’t matter as this was the bit that attached the wheels back onto the walker but your wheel design may not be the same so just bear that in mind.
Step 4:
Once I finished my first can I waited a full 24 hours before doing a second coat on everything. You could wait till the paint is touch dry but I found this sometimes means bits stick to the newspaper and then it dies parts of your paint black. Also doing it this way meant that I could pace the project and not kill myself doing it.
Step 5:
Once you are happy with the paint job you will need to leave it to at least touch dry before adding the protective coat (always read the bottle for this as different paints vary). I only used half a can of the gloss coat but I am not sure how well that has protected my stuff. As time goes on I will update this to show you how it wears.
Step 6:
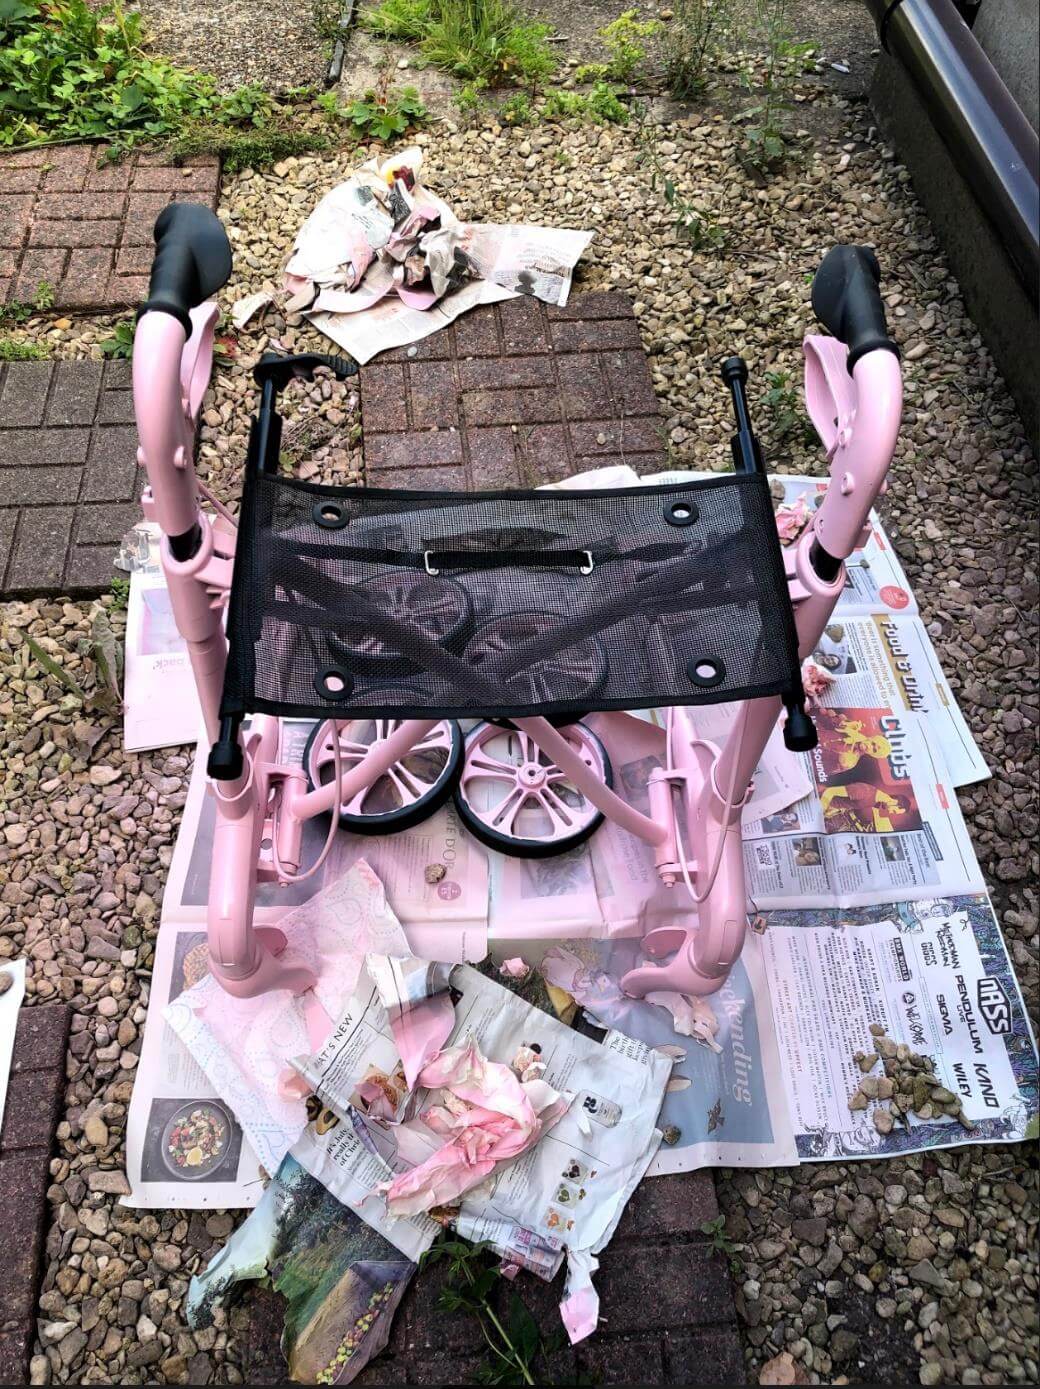
Once the protective coat is dry the fun part begins! Rip off all your masking tape and newspaper to reveal your newly painted walker!!
Step 7:
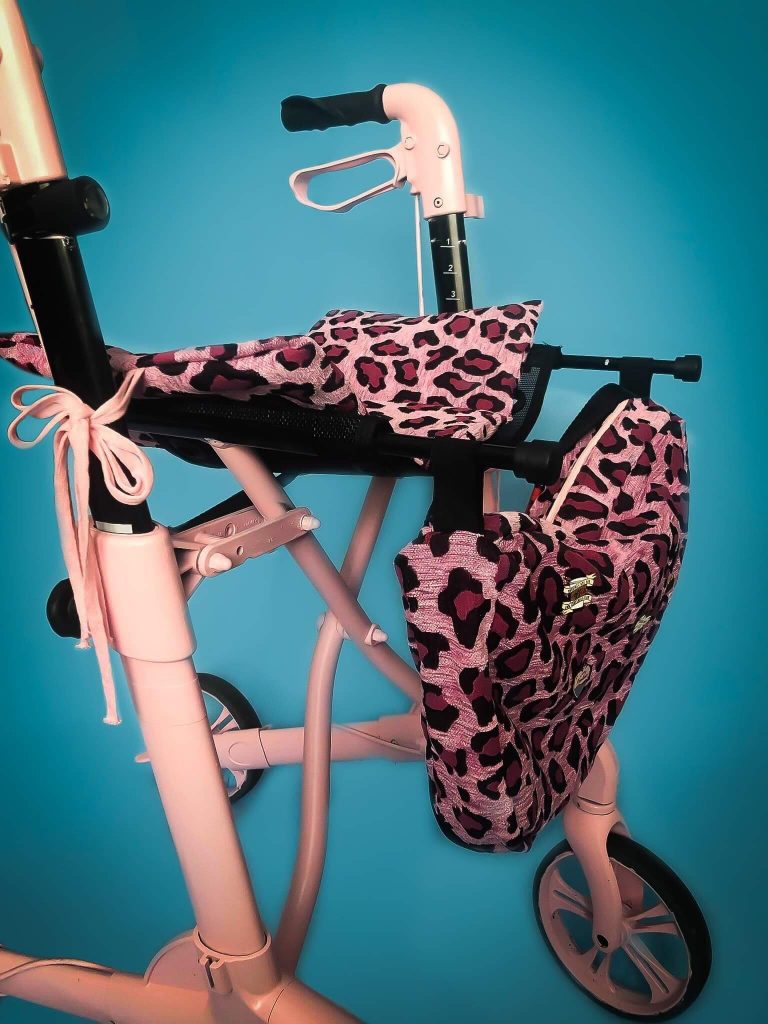
To really update my walker fully I worked with a local artist to get a bag and seat cover made that really stood out (shout out to the wonderful @Twin_Made). I am able to do some sewing but I wanted something that really stood out. She also made the best seat cover that now means I am not jabbed in the bum whenever I sit down. I would suggest that you either get in touch with Charlotte over on insta or that you look for local artists in your area and ask them to create something for you.
And there you have it, my pimped walker! I can’t wait to see the designs that you guys create and please, please share them with me on the Instagram hashtag #PimpMyMobilityAid or in the facebook group!

0 comments